Baba Yaga Music Home » Encyclopedic Dictionary » Costume Index » Many-Colored-Land»

|
|
Color: Black is a traditional and easy theme color for tribal belts.
Pattern: A fabric with a woven-in design is often a good choice if you don't intend to ornament the belt body after sewing. Brockade, ikat and tapestry provide built-in designs. Grain: This pattern is designed for a belt body, lining and ties cut on the grain, which means with sides running parallel to the selvage or to the weft (woven threads). Cutting on the grain makes for strength and stability; cutting off-grain will permit the fabric to stretch in uncontrolled and undesired ways. |
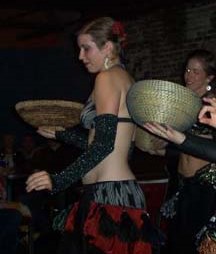
Ruric-Amari in the belt prototype. Because of the darts, the belt is level, not tilted from back to front.
|
|
The upholstery remnant table at your local or online fabric store is a good place to look for fabric, but be careful. You don't want to end up with a belt that looks like sofa upholstery. If the pattern appeals, analyze how it will look on stage around your hips.
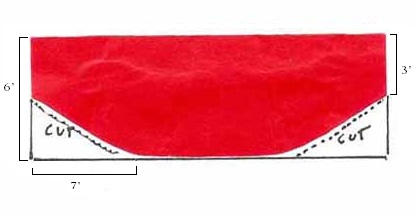
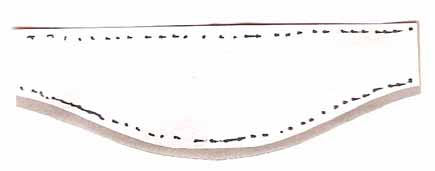
Start by measuring around your hips at the widest point. This is your hip measurement. Then decide how deep you want the belt to be in the back. The examples in this tutorial make a 5" deep belt. These instructions can be adapted to suit a wider OR a narrower belt. Elongate the slope of the belt front towards the back. Depending on the depth, you could end up with a belt hem that is almost entirely on a curve.
|
Fabric for Body: 6” x (hip - 2”)
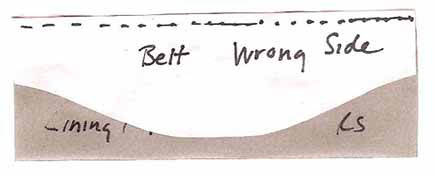
Fabric for Lining: 6” x (hip -2”) Fabric for Optional Underlining: 6” x Fabric for Ties: 10” x 42” Grosgrain for optional reinforcement: Four yards of 1/4” grosgrain. Tassels:Depends on the width of the tassel. If you are making your own from yarn, try 1 per 3” length of belt. Ornamental bead with 3/16” hole: 1 per tassle |
Mark the front slope on the belt using chalk or fabric pen.
|
|
|
|
|
|
Make two flat ties neatly and quickly by following the instructions in the Ties page. Make ties that are at least 18 inches long.
|

|
|
Goal: create exterior darts that will make the rectangular belt conform to your figure, be less likely to slip down while dancing, and maintain shape under stress.
These darts are not like the ones on dresses.
Mark dart position by dividing the the belt into eighths and pressing the folds. (It does not HAVE to be eighths -- but eighths seems to work well across a wide variety of sizes and materials.)
|

|
|
Pin and sew darts at folds 1, 3, 5, and 7 as marked on the diagram. The darts are 1/2” inch at the top and taper to 1/8” at the bottom. Because of the turn of the cloth, these four 1/2” darts reduce the belt waist size by 6”.
You can run the dart to the very bottom of the belt, or you can stop part way. Your choice. If you want to have darts at points 2, 4 or 6, you can: but narrow the taper of the dart to 1/4 inch or you may end up with a waist that is too small. Unless, of course, that is what you are trying to do ... resize the belt for a smaller person. As you make your darts, you will see your belt curving a bit. This is what makes it fit better. | |
|

|
BabaYagaMusic.com
Maura Enright, Proprietor
Author: Maura Enright
©2013 - 2016 by Maura Enright
Last updated Jan 2016
© means the content is copyrighted. Your links to this content are much appreciated.
maura@babayagamusic.com