The Simple Hem
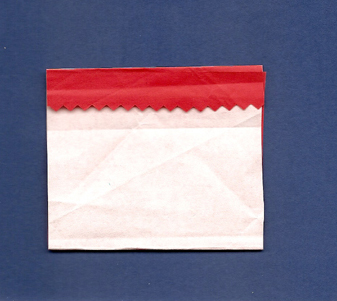
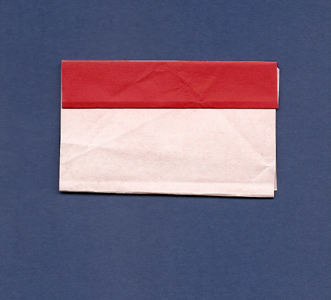
1) Press the outside edge to the inside. If this is a hem for a circle skirt, try to keep the fold no more than 1/4" wide. (If a veil, no more than 1/8" wide.)
BabaYagaMusic.com » Encyclopedic Dictionary » Many-Colored-Land » Costume Index »
Good hems balance the entire look of the costume, enhance the way the costume moves when dancing, flatter the dancer´s figure, hold up during repeated cleanings, and keep the garment from fraying and catching in a toe or heel.
Before you cut, think about the end result desired. Do you want a light and floaty edge? Very narrow hems often work very well for circle skirts and sleeve hems, since a light and floaty edge is desirable in these pieces. But if you want the garment to look and feel weighted (as in a royal dress or coat or ornamental skirt panels) then consider a deeper hem.
Make sure your garment has stretched. In the case of a not-too-full skirt with no seams on the bias, overnite will be fine. In the case of skirts made of circles (or the double-square skirt with ruffled hem), you must hang your skirt for a week. Why? Because BIAS STRETCHES and a skirt with lots of bias in it WILL STRETCH LIKE CRAZY for the first week. If you hem it immediately you will have to rehem it! What a drag! If you don't have a week, and your fabric is washable, you can try wetting it thoroughly and letting it hang until dry. (The weight of the water helps expedite the stretching).
Do not get sloppy! It is so easy to get sloppy on hems because they are often the last thing to do on a costume piece that you have become sick of sewing. Bite the bullet and treat yourself to a smooth and durable hem. You'll thank yourself every time you wear the costume.
To keep hems smooth, make the area under the needle a stress-free zone. Don't let the weight of the garment drag or twist the material while you sew it; keep the costume supported as much as possible on a table, stool, or similar surface. Keep the wide side of the pressure foot on top of your hem whenever possible. And press before you sew!
| Standing Chalk Hem Marker (Stock number CM2 in 2014) at Wawak Sewing. |
| Cut the hem while the dancer is still on the premises, in case there are spots where the marks are not clear or non-existent and a refitting becomes necessary. (In case of refitting - remember to position the pin marking the center back at the dancer's center back, especially if working with a skirt or pants.) A rotary cutter works great AS LONG as you keep the rest of the skirt away from where you are cutting! |
Here's the Big Picture: the easiest fabrics to hem are natural fabrics (cotton, silk, wool, rayon) with a plain weave, because you can press them into shape before stitching them. Remember that there is a troubleshooting section at the end of this page.
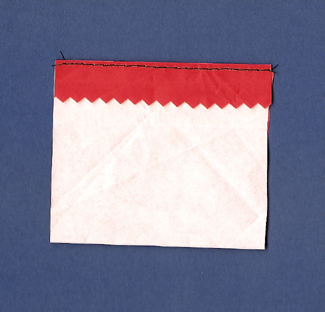
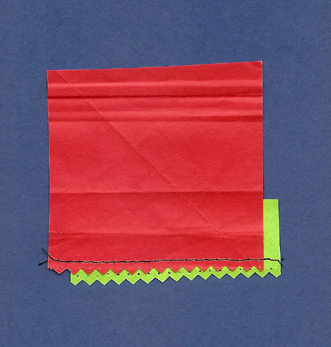
The Bias Trim Hem1) Purchase or make bias trim. For the Square Circle skirt I cut a big square (52 x 52) of skirt fabric, dyed it pink and made 20 yards of bias out of it.2) Stitch right side of bias to wrong side of skirt along the edge. |
| |
|
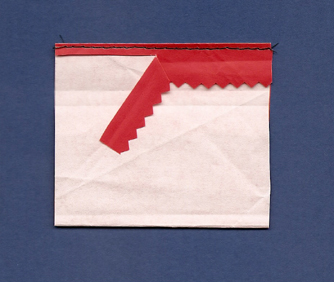
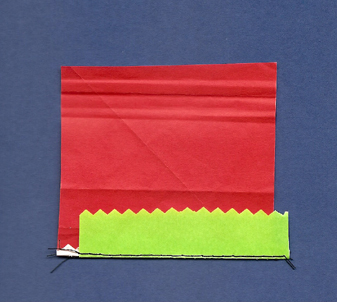
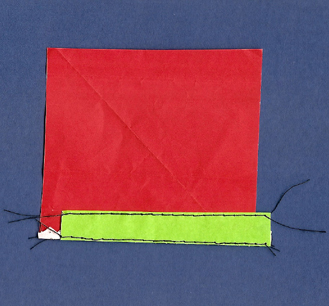
3) Turn the bias to the right side and press.
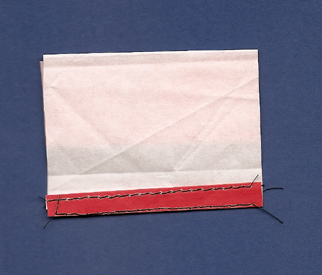
4) [Optional] Stitch along the very edge of the hem. |
| |
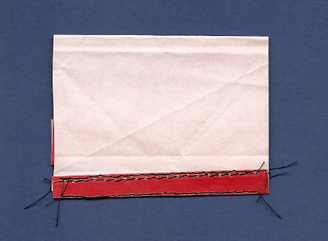
| 5) Press the remaining raw edge of the bias under 1/4 inch. Baste with pins or thread if necessary to maintain the shape of the bias strip. Stitch the folded edge of the bias to the skirt with a long straight stitch. |
|
| PRESS means pick-up-the-iron-and-set-it-down, NOT slide-the-iron-along-as-fast-as-you-can-because-you-are-sick-of-this-skirt. You will slide the entire hem out of grain and into ripples! |
Straight Hems will not press flat:
Circular or curved hem will not lay flat
|
BabaYagaMusic.com
Maura Enright, Proprietor
Author: Maura Enright
©2013 - 2014 by Maura Enright
© means the content is copyrighted. Your links to this content are much appreciated.
maura@babayagamusic.com