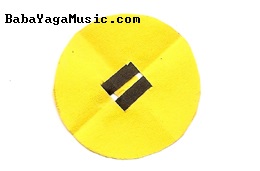
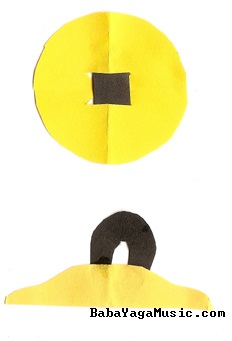
You now have two loops on the top side of the zills for your fingers. To the right is the view from the bottom after the two looped ends of a black hairband have been pulled through completely.

View from the bottom

View from the side
BabaYagaMusic.com » Encyclopedic Dictionary » Many-Colored-Land » Costume Index »
Goal: Zill elastic that holds the zills on your fingers AND that has a neat appearance. Lots of dancers attach their zills with knots on the bottom or the top. This looks terrible! Sew it on properly and let the zills accentuate your appearance instead of detracting.
Elastic: I recommend braided elastic. The knitted elastic is too soft; the woven elastic, although stronger, is too thick. Braided elastic comes in black or white. Dyeing it will cause it to deteriorate faster. Soaking the elastic in a bowl of very strong tea will color the elastic to a shade closer to skin color. The elastic used for ballet toe shoes is also an option, as long as it is braided elastic. Elastic fact sheet at the Sewing and Craft Alliance.
The width of the elastic is important. It should, at least, be as wide as the slots on the zills. Some use wider elastic to stabilize the zills. I keep a supply of 3/8" and 1/2" braided elastic around for zills.
How: Zills are worn on your thumbs and middle fingers. If you choose to use a width of elastic which is wider than can be comfortably threaded through the slots in the zill, getting the elastic through the slots can be tricky. Poking the elastic through with a sharp-pointed object is typical but it weakens the elastic and can be dangerous to you. I recommend pulling, not poking, whenever possible. If using braided elastic, cut one end to a point and then thread it down through the zill slot. For the hairbands, a loop of strong thread (pearl cotton is ideal) will guide the hairband up through the zill slot with minimum fuss.
So, one goal out of two!
The studio has several sets of cheap stamped zills kept for loaners. Cheap stamped zills tend to have long and wide slots.. I cut 5” of ½” elastic, thread through the slots (from underneath, over the top and down again), and sew the loop closed.. Students wrap them around their fingers twice and adjust as needed.
Hair bands are not just for hair anymore!
| Working from the bottom of the zills, loop a 12-inch length of strong thread or pearl cotton through the hair band and pull one end up through one slot. Remove the thread, loop it through the part of the hair band that is on the underside of the zills, and pull the band up through the other slot.
You now have two loops on the top side of the zills for your fingers. To the right is the view from the bottom after the two looped ends of a black hairband have been pulled through completely. |

View from the bottom
|
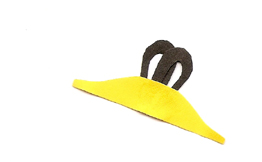
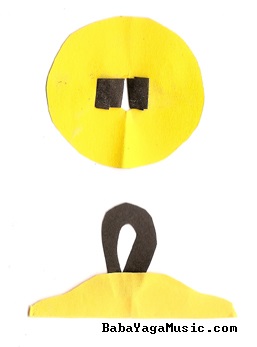
| Even out the two loops on top. Voila! Here is the view from the side after the two looped ends of a black hairband have been pulled through and evened up. |

View from the side
|
Yes, the success of this depends on the hairband you use and the size of the slots in your zills. You may need to test a couple of different sizes and widths. If you find a style that works that also comes in colors, you can color coordinate with your costume!
Two-slot zills are the most common zills. The elastic is threaded as one loop coming up from the bottom though one slot and down through the other. You are going to sew the elastic into a loop with the stitches on the underside of the zills. Then you will turn the elastic over so the raw edges are hidden from view of your audience.
All zills have a little dome in the middle where the elastic slots are. If you place the zills on the table so that the dome is up, then the top of the zills are facing up and the bottom of the zills are facing the table.
You will find that the loops on the thumbs are bigger than the loops for the middle fingers. You may wish to mark the zill elastic on the thumb zills with a dot of nail polish for fast identification. Loose zills can fly off and hurt someone.
|

|
One hole zills are more commonly used by professionals who know how to control them. They are often fastened on the fingers using a wide elastic cord which is knotted into a loop on the underneath. However, you CAN use flat elastic in these zills if you prefer. You are going to create an elastic U rather than a loop, with the raw edges on the underside folded back onto themselves and stitched down so they don't get pulled through the hole.
|

|
BabaYagaMusic.com
Maura Enright, Proprietor
Author: Maura Enright
©2013 - 2014 by Maura Enright
© means the content is copyrighted. Your links to this content are much appreciated.
maura@babayagamusic.com