Baba Yaga Music Home
» Encyclopedic Dictionary
» Costume Index
» Many-Colored-Land
»
[ Keep up with new discoveries with a free subscription to the Baba Yaga Newsletter. ]
Make your Dog a Dog Bed
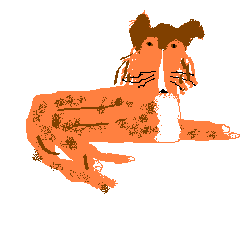
Two Socks was our beloved Shetland Sheepdog (Sheltie) who ended up growing a lot bigger than he was supposed to be. Instead of stopping at 20 lbs (and a yip-yip-yip) he grew to the size of a small collie (and a woof-woof-woof). I was never able to find a dog bed he would adopt as his own. He would make nests out of any fabric that he found on the floor (as in, fabric that I was getting ready to cut into skirts or curtains!) and lay there on two or three layers of fabric as though he were in a featherbed. When he permanently injured his left back leg (jumping off my bed onto a wood floor, perhaps?) this lack of a worthy bed became a concern. I finally created a dog bed that he loved. Maybe because it had the look and feel of a futon (like mine), I do not know! Anyway, this bed was big enough to hold all of him, soft enough to accomodate his hurt hip, and firm enough to give him traction when he tried to get up.
The picture was created by my daughter, Ruric, when she was 11 and he was 1. We both miss him very much.
This bed is a SANDWICH of blankets and foam mattress pad. The cover is a box-shaped pillowcase with no zipper or other closing. The size of the blankets and mattress pad can be smaller (for a smaller dog) or larger (for a larger dog).
The sandwich has 14 layers:
- A double-size blanket, folded in quarters, on top. This is a good use for ugly old blankets that you don't want to throw out but hate using!
- A twin-size memory-foam mattress pad, folded in half, in the middle.
- A double-size blanket, folder in quarters, on the bottom.
To make sure you have the right size components, fold one blanket into quarters. Pin the corners if necessary to keep the layers from shifting. Lay it on the floor and encourage your Dog to lay on it. My dog wasn't comfortable with the size until it was big enough to hold all of him.
Layer the bed sandwich:
- When the size is established, remove all bindings and open up all hems on the blankets. Iron or stitch the edges flat.
- Cut the folded blanket into four quarters and lay it on a flat surface.
- Cut the memory foam into two halves and lay it on the folded blanket. Trim to fit the blanket.
- Cut the second blanket into quarters and lay it on top.
Secure the sandwich layers with tufting.
- Tufting is a good old-fashioned way of holding the layers of quilts and mattress together. You thread a long strong needle with strong thread, string or yarn. A darning or chenille needle or other utility needle works well. Do not use ordinary sewing thread - it is NOT strong enough. Use perle cotton, crochet string, embroidery floss, upholstery thread or dental floss.
- Each tuft will be about 4 inches apart, spaced evenly across the bed. Since no one is going to see the tufting, guesstimating the position of the tufts is fine.
- Each tuft will need about 18" of yarn or string. You can do them one at a time or put enough for several tufts on the needle at once. Don't put a knot in the thread.
- Support the sandwich on a table while you tuft.
- Insert the needle into the top of the sandwich and push through to the bottom. Leave a three-inch tail of thread showing on the top when you pull the thread through. Come back up through the layers and out on the top no more than one inch from where you went in. Pull the thread so that it is tight but not so tight that it makes a pucker in the layers.
- Do a single back-stitch on the very top layer to hold the stitch in place.
- If you are doing multiple tufts on a single thread, then hop over to the next tuft location and make another tuft.
- Now, cut the threads and tie the two tails together, using a square knot. Trim any tails over one inch.
Make a cover.
- A long pillowcase shape works fine.
- Make it extra long and the end will flop over and hide the bed sandwich - no zipper required.
- For a boxed end: put the cover on the bed inside-out. Make sure the closed end seam is centered across the bed end.
- Fold the corners of the cover up as though the cover were wrapping paper and you were wrapping a box.
- Pin the fold into place and carefully remove the cover.
- Stitch along the fold, backstitching at both ends. Trim off the excess flap, if desired.
- Put the cover on the bed making sure that the boxed end fits the bed smoothly.
- If you want to secure the open end -- use velcro.
BabaYagaMusic.com
Maura Enright, Proprietor
Author: Maura Enright
©2013 by Maura Enright
© means the content is copyrighted. Your links to this content are much appreciated.
maura@babayagamusic.com